Black and White Photographs
"Lose the Colour but See More"Original Article by Helen Harris
"Article first featured in Olympus User Magazine"
IT'S INTERESTING HOW many newcomers to digital photography 'forget' about shooting black and white photographs, as they're so impressed by the blazingly colourful images from their new camera. Many digital novices assume that their cameras can't do black and white (after all, there is no special film to buy, as with 35mm devices), or that converting colour shots to monochrome* involves an evening class in esoteric software.
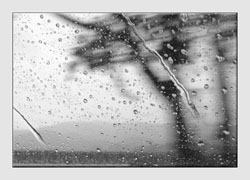
This couldn't be further from the truth. Producing black and white photographs in the digital age is actually very straightforward, whether you do it in camera or with image-editing software, and the results can be stunning - every bit as good as you get with 35mm specialist film.
But why shoot in black and white, when camera makers spend so much money developing vibrant colour technology?
It's all about aesthetics. Black and white photographs can convey a timeless, 'classic' look that simply isn't possible with colour. This is especially true with portraits and landscapes: take a moment to think about the amazing monochrome portraits that have moved you over the years, or the haunting effect of a winter scene with all the colour drained away. Wedding shots often look more romantic in monochrome, too.
Shooting for black and white can also make you a better photographer.
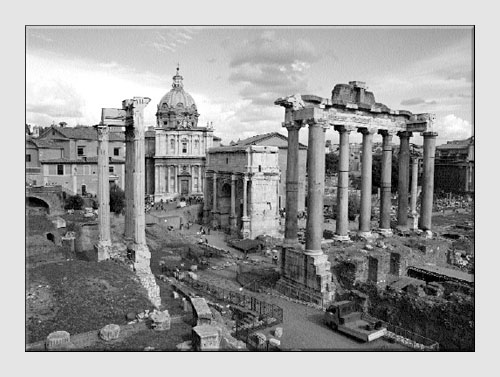
With no colour to focus your attention on, you need to think more about light and shadow, composition, contrast, shape and texture - the essential elements of black and white photographs, mastery of which will also transform your colour shots.
* Note: we're using 'monochrome' here to mean black-and-white monochrome.
Black and white - the stark choice
So you want to have a go at shooting in black and white photographs, but where do you start? Should you simply switch to Monochrome mode in your camera and start shooting, or shoot in colour and then convert the shots afterwards?
The first option would seem the easiest, but it's not without its pros and cons. First, the pros. If you have an Olympus compact you can preview the shot on the back screen, and this is a great way of seeing the world in monochrome. You get an immediate sense of which parts of the shots will look best in black and white, something that's very hard to do with the naked eye. This can save a lot of time with image-editing software.
If you own an Olympus E-500 SLR, there is a selection of filters that enable you to shoot in black and white, too. As the image you shoot is converted from RAW to JPEG format, you can change it to a range of monochrome options: Black and White, Sepia or Tinted (red, green or blue). A special red, orange, yellow or green filter built into the camera gives you different monochrome rendition of various colours. This is powerful and effective, though as with all SLRs, you don't get a live preview of the shot first.
A downside of shooting in monochrome in camera is that you lose some control and flexibility. In essence, you are making the key photographic decisions at the time of taking the shot, rather than giving yourself time to open a colour image afterwards in an editing program, such as Olympus Master, and then deciding how much you want to tweak the shadows, contrast, tone, and so on. Also, taking a shot in colour and then converting it to monochrome means that you can hang on to the original colour image and save the converted one under a different name.
We must stress, though, it's entirely a matter of choice, and there is nothing fundamentally 'wrong' with taking monochrome shots in camera; it simply comes down to how much time you're prepared to spend perfecting your shots afterwards with software. Nearly all professionals who produce black and white photographs choose the latter option.
top tips
Photographic tips for shooting in black and white

1
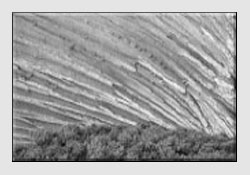
Try to capture distinctive patterns, lines and shapes in architecture and natural objects as you compose the shot in the viewfinder or back screen - these become more accentuated without colour. This is why so many abstract shots are in black and white.
2
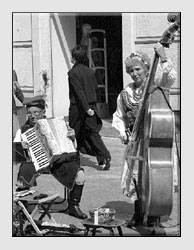
Texture is vitally important too - well-defined textures, be it a tyre tread or an ancient tree's bark, can look wonderful in black and white photographs.
3
Try and shoot images with lots of high contrast - sharply contrasting objects will look even better in black and white; muddy, ill-defined edges will look worse.

4
Don't be afraid to crop in close on portraits - faces tend to look smoother and more commanding in monochrome, with blemishes and discolouration not as noticeable.
5
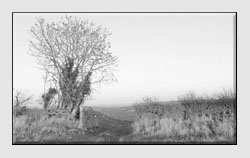
Don't worry so much about dull, grey skies - washed-out, overexposed skies are not so noticeable in monochrome, and you can easily darken them for extra atmosphere.
Going black and white with Olympus Master
For fast, easy black-and-white conversion, the good news is that you already have the tools you need in the shape of the Olympus Master software, which came free with your camera. But before opening the software, you need to select images that are suitable for monochrome conversion in the first place. Obviously, you want a shot that doesn't rely too much on colour (so maybe not daffodils or sunsets) and has well-defined tones - remember, sharp tonal contrast is really important here.
1
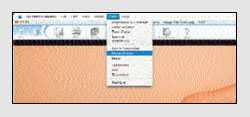
With your image open in the main program window, go to the Edit mode, then the Filter menu and select Monochrome.
2
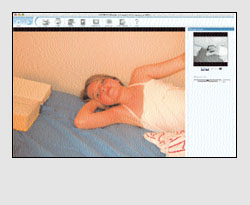
You should notice a Contrast slider to the right of the picture. Drag it to adjust the contrast so you can see the changes above the slider. Be subtle with this tool, as opting for too much can remove detail and shadow.
3
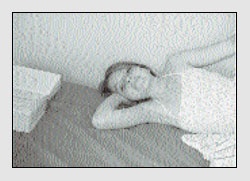
You can also click the edit box and directly enter a contrast value using the keyboard (values range from -100 to +100). Click Apply and the monochrome effect is applied to the image.
Black and white: the next stage
While Olympus Master is great for fast conversion, you will need to use a dedicated photo-editing program if you want a finer degree of control over the tonality of your black and white photographs. Such programs are much more flexible than in-camera monochrome conversion, too.
The leading programme is Adobe's Photoshop, which you can find out more about at www.adobe.co.uk. While not cheap, it's got incredibly powerful tools for monochrome conversion and other common photo-editing tasks. Cheaper alternative photo editors include Photoshop Elements, a cut-down version of Photoshop, and Corel Paint Shop Pro X.
In this tutorial, we've used Photoshop, as it's so popular and widespread, but versions of the tools we use can be found in other photo-editing programs. We haven't got space to provide a detailed Photoshop guide, but here are some great ways to improve your black-and-white results.
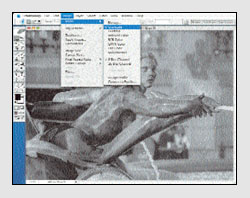
1 Going to grayscale
A simple grayscale conversion (Image menu, Mode, Grayscale) is the easiest way to go to black and white photographs. Photoshop separates the colours by tone, so the results aren't bad, and the size of the image goes down dramatically.
Unfortunately, you have to convert the image back to RGB mode to edit it in detail and apply Photoshop filters.
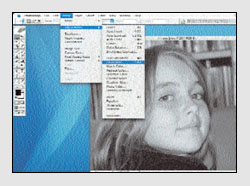
2 Desaturation
If you want to do further editing, a good option is to desaturate the colour image (Image menu, Adjustments, Desaturate). You can then apply other Photoshop tools and filters, as we show later. The only problem with Desaturate is that it isn't very good at distinguishing between the different tones in a black-and-white image.
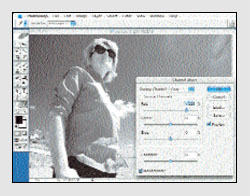
3 Mix the channels
Our favourite option for monochrome conversion is the Channel Mixer. It's a bit fiddly, but worth persevering with (Image menu, Adjustments, Channel Mixer). Channel Mixer emulates the effect of conventional filters for black and white photographs by enabling you to adjust Red, Green and Blue channels.
Boosting Red, for example, will lighten the reds in the image, while lightening Green and Blue - experiment until you get the best effect.
Note: ensure the Monochrome box is ticked!
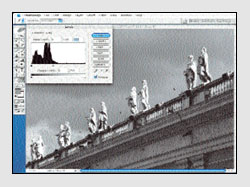
4 Improving the highlights
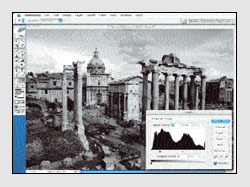
Black and white photographs can look a bit 'dead'. Photoshop's Levels and Curves tools can remedy this, by boosting the image's tonal range. Here, the sky was very dull so we improved the tones by using Levels, under the Image menu. Slowly drag the central pointer to the left in the histogram until the tonality improves.
5 Fixing overexposure
Overexposure is less of a problem with black and white photographs, but it can be a headache with less-powerful cameras - instead of rich, dark shadows, it's all wishy-washy.
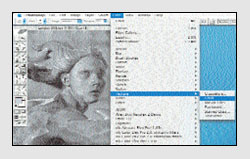
Here, we darkened the shadows and atmosphere of ancient Rome by moving the black pointer (left hand side) to the right of the box. Experiment with what looks best.
6 Add some grain
Black and white photographs often respond better to filters and special effects than colour shots, so make use of the ones that come with your software. A good one to try with Photoshop is 'Grain', which gives your image a tasteful, antique quality. Go to Filter/Texture/Grain. Be subtle, though; you want 'soft' grain rather than something sharp and obvious.
7 Dabble with Duotones
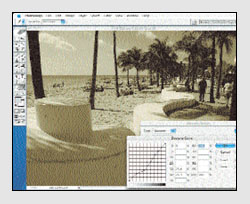
As mentioned, monochrome needn't mean black and white photographs all the time. Interesting retro effects can be achieved via Duotones. Convert the image to Grayscale, then choose Mode/Duotone from the Image menu. Pick the second colour from the Ink 2 box, and control its intensity by dragging the curved line. Drag down to reduce the intensity, up to boost it.
Final thoughts
The most important thing to remember is that even the dullest black and white photographs can be improved with software, but you can save yourself time by thinking about the particular qualities of black and white when you take the shot in the first place.
Finally, a word on printing. Odd as it sounds, it's best to print with the colour output option rather than choosing 'black only'. You could also choose a better-quality home printer that supports grey inks. It is worth calibrating your printer for monochrome printing too - see your printer maker's web site or the manual for details on how to fine-tune the settings. If you print black and white photographs regularly, it's worth getting a second, 'mono only' printer and using specialist inks.
© Olympus UK
Click here for more Tutorial Articles by OM Systems
(formerly Olympus Cameras).
Return from Black and White Photographs to the Photography Tutor page.




New! Comments
Have your say about what you just read! Leave me a comment in the box below.