Photography Lighting
"A Critical Element"
Take the same viewpoint of the same subject with different photography lighting and you will often see images which look very different.
We will look at different ideas on lighting later but as a general rule, try to keep the light source behind you and to one side so that it illuminates the subject with a slight shadow. Also, if the subject happens to be a person, this will help ensure they do not squint.
Most photographs look best in natural light, even when the light is dim. Light and shade communicate mood and help to emphasise parts of an image.
A lot of cameras have a built-in flash. Make sure that this is turned off unless you really need or want it for a particular image. Too many great pictures are spoiled because the auto-flash fired unnecessarily or because it was positioned incorrectly -
click here to review guidelines on holding your camera correctly.
There are numerous ways to apply photography lighting to an infinite number of subjects so let’s start with the simple scenario of a young girl by her Christmas tree. We have the choice of daylight from the window and/or flashlight.
Shot in Black and White, the following example shows how natural light can be used to great effect .....
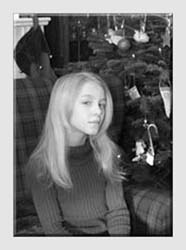
The photograph was taken to send to the young girl’s family - some of whom live abroad and haven’t seen her for a while.
The auto-flash fired and has illuminated the whole scene, including the rather distracting decorations on the Christmas tree.
The result is fine but presents a rather bland image.
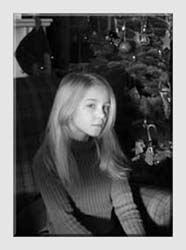
Shot with the flash turned off and making sure that the camera was held steady to compensate for the slow shutter speed, this image has more atmosphere.
It shows off the girl’s hair and facial features much better and does not have so many distractions from the tree decorations.
Why include the tree at all?
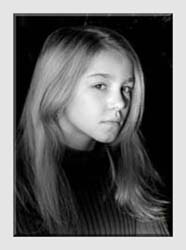
Here is a situation where less is more in the composition of the photograph.
By moving or zooming in we focus attention on the subject with no unnecessary distractions.
As to photography lighting - no more than daylight through a fine curtain at the window. A treat in store for the whole family!
Sometimes, there is no option but to use flash …..
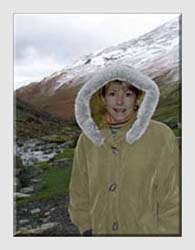
In this photo, the girl is wearing a hood which reminds us that it was a cold winter’s day.
The trouble is that the hood acts as a shade so her face is rather dark.
Removing the hood would spoil the effect so we need another solution.
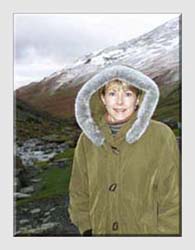
Here is a good example of the need for outdoor flash. By using it, we introduce an additional source of photography lighting which can be used to illuminate the foreground. The background won’t be affected because it is beyond the reach of the flash.
Most modern cameras offer a choice of flash settings and in this case “fill-in” is what we need.
|
|
In the example of photography lighting above, the colour of the light is affected by the clouds and by the snow on the hills. This has given a bluish hue to the photo which we can compensate for by increasing the colour temperature setting on the camera.
Most cameras which allow you to adjust colour temperature help you to do this by displaying symbols which resemble the various types of lighting.
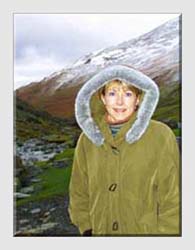
By raising the colour temperature setting to cloudy (look for the symbol which resembles a small cloud on a weather forecast map) before taking this photo we achieve a more natural skin colour.
The coat returns to its rich olive hue and all the colours of the landscape in the background are now as we remember them.
For more details on Flash Photography and the special points to consider when using it for close-ups, visit the Better Photographs Masterclass.
More Examples of Photography Lighting
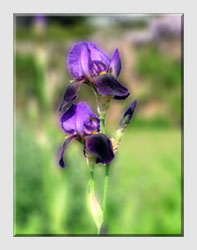
For this photograph, the camera was positioned so that the sunlight came over the photographer’s left shoulder to show off the vibrant colours of the iris.
The background is a little distracting so it was put out of focus by using a shallow depth of field - more on this in the
Focus section .
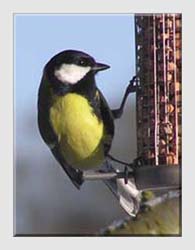
Notice how the eye of the Great Tit has reflected the light. This catch light is a way of showing the eyes of many animals and birds who’s eyes are often dark and not easily seen.
Also, the direction of the light across from the side shows off the texture of the feathers and also reveals the contours of the nuts it is eating.
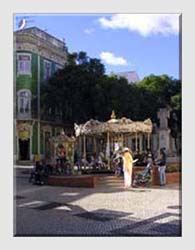
In this example, notice how the sunlight catches the pale clothing of the mother watching her child on the roundabout.
This provides an initial focus of attention as your eye then moves around the picture to explore the roundabout and then the architecture of this old Portuguese town.
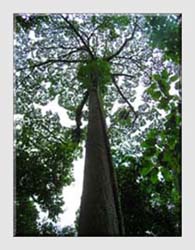
Sometimes it is appropriate to shoot against the light. Here we want to show the branches and foliage of a tall tree in the Kinabalu forest in Borneo.
To display them to best effect, the picture was taken against the bright light of the sky to create a silhouette.
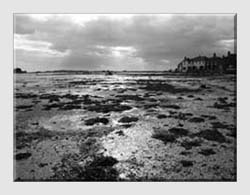
With the sun casting shafts of light through the clouds which then reflect off the mud flats in this estuary, we achieve a dramatic effect.
Shot originally in colour, this photo was converted to monochrome using PC software. More about how to do this is explained in the
Photo Editing section of this website covering how to MAKE BETTER PHOTOGRAPHS.
To find out more about these simple techniques for taking better photographs, visit the section on
Photography Techniques.
Return from Photography Lighting to the Photography Techniques page
 |
| Image of the Month |
 |
| Click here to download it. |
| Find It |

Custom Search
|
| All of the advice, tutorials, masterclasses and ideas on this website are available to you at no charge. Even so, its upkeep does incur costs. |
|
| If you feel that the site has helped you then any contribution you make, however small, would go towards its ongoing maintenance and development. Thanks for your help. |
| Book of the Month |
 |
| Click here to read the review. |
