

Street Photography"A Beginner's and Improver's Guide"
|
| Colin's aim
is to capture how the immediate environment often determines human
behaviour. He is a Fellow of the RPS Travel Group where he enjoys the company of many like-minded photographers. |
 |
Let us look at some of the more important considerations for those new to street photography:
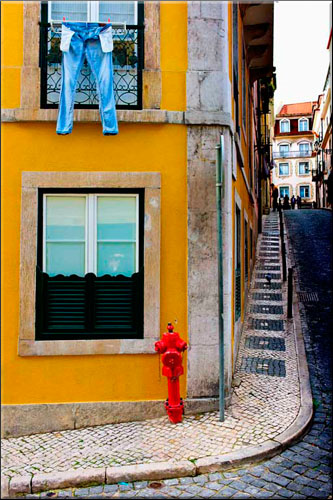
| Location street photography This could be anywhere in principle but it is probably better to start with a location close by, near enough to make repeated visits in different weathers and different times of day, but not so familiar as to deaden the eyes to new images. The next town, a different suburb of a major city, or somewhere you are familiar with through past associations. One important aspect is that it should be an area in which you feel comparatively safe from unwanted attention of muggers and the like. There is something to be said for safety in numbers, and I have often gone to areas together with a shooting partner. It also means we can swap notes over a coffee and invariably one sees something visually exciting that the other misses. Finally, it makes sense to choose a location with one or more iconic landmarks. Apart from adding background interest, such landmarks attract a wider range of visitors with photogenic potential, festivals at various times of the year, and a certain historical interest. |
|
Buildings street photography
In my view buildings and architectural photographs rarely excite unless the light is right. This does not mean a blazing blue sky although medieval buildings always look their best in bright sunshine. Dark cloisters lit at one end makes for drama, regardless of the cloud cover, and wet cobbles after rain embellishes the feeling of old streets. Look for detail in cornicing, unusual notices, even street names on walls: these make good "filler" pictures if you intend to make a photobook.
Some care needs to be taken if you wander onto private ground as many building owners have an attitude that they do not want their property photographed. Such boundaries are often marked with studs on the pavement. However, you are perfectly within your rights to take a picture of any building from a public thoroughfare, no matter what any security official might tell you.
People street photography
It is fairly hard to indulge in street photography without getting to grips with portraiture. For me the relationship between people, buildings and the environment is what street photography is all about.
This is not simply just using a long lens to capture people unawares and at a distance. It Is about interacting with those you encounter to achieve a meaningful interpretation as to what is happening around you. I often ask, perhaps by making some (polite!) remark about what they are wearing. T-shirts bearing all sorts of phrases and words are ideal conversation openers. If English is not their language, merely by saying hello and pointing to your camera is enough to get an entrée. This takes quite a bit of courage the first couple of times, but after a few "yeses" your courage will increase!
 |
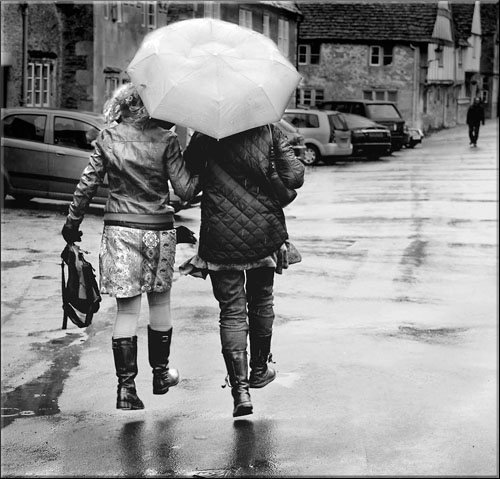 |
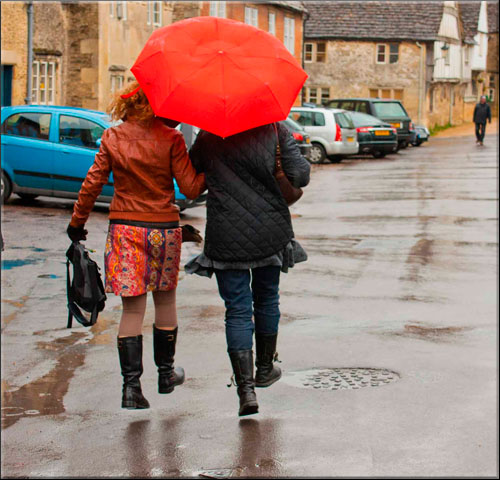
Figure 2: A (very) wet day in Lacock,
Wiltshire. Two
tourists were skipping in the rain - I managed to get all four feet off
the ground but the colours are a distraction so I converted this to
black and white (and removed the manhole cover!).
Children represent a particular issue. I now studiously avoid images of children unless there is clear parental consent, especially at home in British cities where every camera owner is now treated with suspicion. It is a great pity that we are in danger of having a whole generation of children without a pictorial record of their growing up beyond the family home.
Time of Day street photography
As with all other genres of photography, the quality of light and how you adapt to it is critical to achieving pictures with impact. A bright sunny day is not the best, presenting exposure problems through highlights and deep shadows, especially between mid-morning and mid-afternoon. I find this time of day is best for reflection shots and to look for unusual patterns of bright light reflected from glass-fronted offices and shops. Interesting shadows of people are to be had when the light is oblique, for example in the winter. Hazy but bright days are the best for all round street photography, especially for markets and general shots with people and crowds.
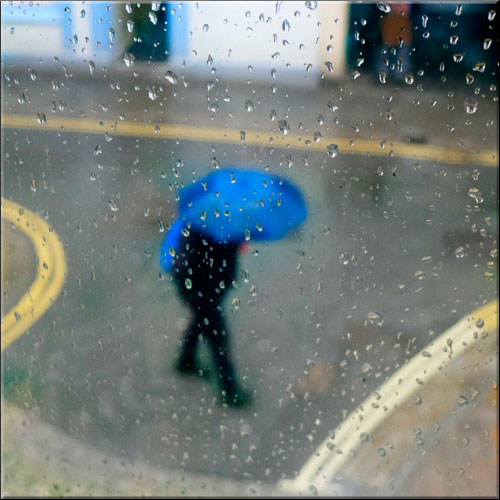 |
Figure 3: Bad weather is also good for
street photography, especially after rain
when there are often interesting reflections from wet roads, pavements
and puddles. Colours are more saturated and any foliage appears to have more “depth”. And of course, fog and early morning mist gives an ethereal feeling to even the most drab of cityscapes. |
Consider also photographing at dawn, dusk and even at night. Digital cameras respond interestingly to different types of artificial light and the use of fill-in flash can add extra interest.
Be careful, however, of your own safety at night, and shoot with a companion or as a group. Notwithstanding, images beyond the usual are almost guaranteed by making the effort of rising early or foregoing an early night. You will need a tripod, however, especially if you intend to use slow shutter speeds for vehicle trails and to “ghost” pedestrians.
Have a project in mind street photography
Rather than aimlessly taking pictures, it helps to have a project in mind. This can be a theme, e.g. street markets, or locations e.g. an individual street. This focuses your effort and helps to build a portfolio.
Successful projects are to be found also by selecting street details, e.g. house and shop doors and windows. Photographing shop displays is a good introduction to using your camera after dark.
Let's now look at the gear and techniques that can be useful:
Technique street photography
The street is not the place for a large bag full of lenses - indeed you will soon tire of the weight if you choose to carry every last bit of kit around with you all day. I typically shoot for 2 to 3 hours at a time, often with just one body and lens combination.
The smaller and unobtrusive the camera the better, and my preference is to use a fast (f1.4) 35mm fixed lens. This covers over 90% of the shots I take and the fast aperture means I can throw a background out of focus if necessary. Occasionally I will take a 50mm lens in a pocket. A spare battery is essential, two if you can afford it. A hand strap rather than a full length neck strap means that you always have your camera ready to capture a fleeting moment.
One difficulty is the lag time for digital cameras to switch on and be ready for a shot. If possible keep your camera activated by pressing in the shutter or by adjusting the camera's settings if your camera allows.
Get into the habit each morning to check battery, ISO and exposure settings on your camera before you leave home. You never know what fleeting moment might appear in front of you the moment you leave home.
I find constantly reviewing images on the back of the camera is a distraction. My cameras are set that I see the histogram of each image as it is taken to ensure I get the correct exposure.
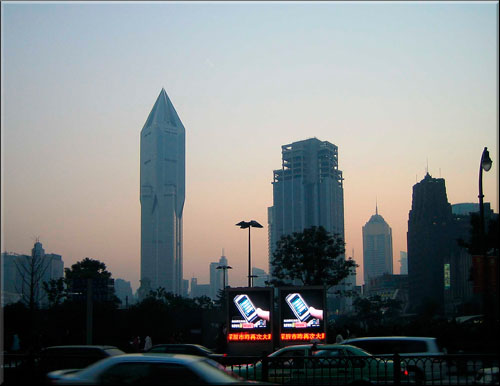 |
Figure 4: Dusk
in Shanghai, China. This says everything to me about the dynamic state
of development in this ever-expounding and crowded city. I like
especially the way the ads mirror the new buildings silhouetted against
the sky. Both this image and Figure 3 were taken on a point-and-shoot’
camera, showing you do not need a bag of expensive kit to take street
photographs.
Focus is everything in street photography, and should be your number one priority. I set my cameras onto 1/250th or 1/500th second, then adjust my ISO setting to give an f-stop of f8, with manual focus set to around 20 feet. This is a good starting point but of course will need adjusting according to circumstances and preference. Road asphalt is around mid-grey and thus I set my exposure by pointing my camera downwards on a road surface.
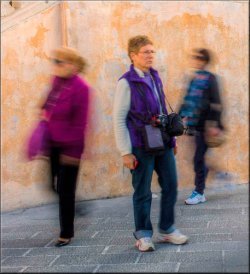
| One
technique I employ constantly is to wait in a location for
something to happen around me. It is invariably the case that, no
matter how busy the location, people just ignore you if you stand still
for long enough. This can be combined by waiting near areas of bright light across your field of vision: if you wait long enough, someone of interest crosses the area and you have an interesting shot! My preference is often to shoot in black and white: to my mind, monochrome offers greater depth to street images, especially where bright advertising, shops and hoardings can prove a distracting background. |
|
Looking around the viewfinder to minimise or avoid distracting bright areas of background is a skill that needs to be practiced. Minor inconveniences such as rubbish and white bags dropped on the ground are best removed if circumstances allow.
Equipment street photography
The use of a tripod for low light photography is almost essential. There are many lightweight carbon-fibre tripods on the market suited to urban photography: I use a Gitzo Traveller series 2 with a ball and socket head, but those made by Manfrotto and many other manufacturers are perfectly good.
You do need to take care, however, when using a tripod. Apart from not causing an obstruction, some people's reaction is that if you are using a tripod, you are a professional and must be discouraged! In London, tripods are not permitted in all the Royal Parks and Trafalgar Square without a licence. The South Bank area of London is in private hands and the owners do not allow tripods.
Clothing street photography
For me, comfortable shoes are a priority. I find walking shoes from ASICS particularly comfortable but inclement weather will require light waterproof boots. Grey or black clothing that does not attract undue attention is also sensible. Trousers with zip pockets ensure valuables and wallets are safe from light-fingered opportunists.
A hat is more useful than an umbrella for when it rains and also prevents dehydration in summer. I wear hats made by Tilley. A hat that is both waterproof and keeps the sun off your eyes helps enormously. Shower caps from hotel rooms make good covers for cameras when it unexpectedly rains. Silk gloves are lightweight yet still allow you to feel most camera controls.
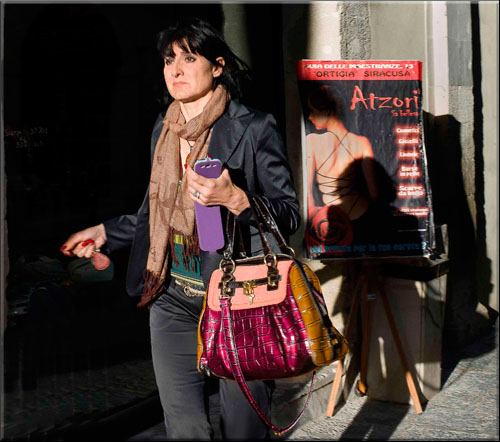 |
Figure
6. It is the light that makes this picture, throwing the subject into
sharp relief against the shadowed background. Syracuse, Sicily.
Getting your eye in street photography
I often abandon digital photography and load a film camera with a roll of 400 ISO film and go off to some town for the day. The intention is to shoot only one roll of 36 photos to capture the essence of the place. I find this good discipline: I have to think through exposure details as well as be very selective as to what I take, not having the chance to review each image on the back of the camera.
It took several years with a digital camera to realise that I need to shoot digitally as if I was handling a film camera, from paying attention to ISO settings to having a catalogue system on my computer that mirrors my negative collection.
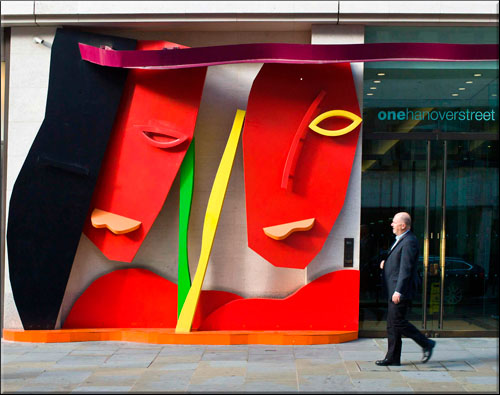 |
Figure 7. I am always on the lookout for
interesting juxtapositions of signs, window dressings and people. Near
Regent Street, London.
Street Photography and the Law street photography
Much publicity has been given to the activities of photographers on Britain's streets given heightened concerns as to terrorism. It is wise to have about you a copy of the Association of Chief Constables' guidance to police forces on the rights of photographers plus any other documentation that proves you are a photographer, e.g. membership card of a camera club or the RPS.
Basically you are within your rights to take pictures in a public place of any building, people including children and events unfolding before you. Police do not have the right to order you to delete images without first obtaining a court order. Obviously common sense should be used at all times. My attitude is that if someone is obviously uncomfortable with having their photo taken, I do not take it or will delete an image if politely requested to do so. It is just not worth the hassle to pursue any form of argument with anyone voicing an objection, whether you are within your rights or not.
A final word ... street photography
It is a pity if, after all your effort, the files are swallowed into your computer’s hard drive, never to see the light of day. Apart from printing a selection of images for your own satisfaction and posting images on websites such as Flickr, the recording of street photography projects by making a photobook is a good style of presentation. What seems to be ordinary in terms of pictures of everyday scenes and details takes on a whole new dimension when presented in book form.
Finally, why not share your work by uploading a gallery to the RPS website if you are a member for others to appreciate?
Enjoy!
Points to consider:
|
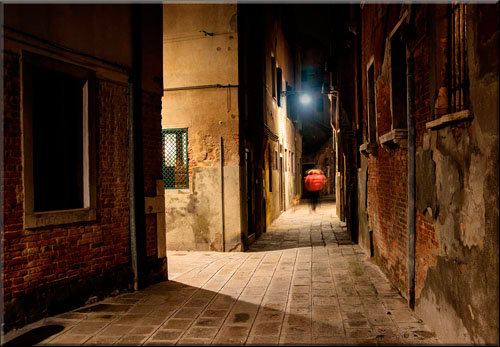
Figure 8. Taking photographs at night can
be rewarding and gives a more unusual perspective. Here I used a tripod
in order to get a sufficiently slow shutter speed to give an element of
mystery to the person walking away. Venice, Italy.
 |
More of Colin's superb Street Photographs can be seen in his gallery at www.colinhowardphoto.com.
Recommended Reading for Street Photography
- The Street Photographers Manual - David Gibson
- Travel and Street Photography - John Batdorff
 |
| Image of the Month |
 |
| Click here to download it. |
| Find It |

Custom Search
|
| All of the advice, tutorials, masterclasses and ideas on this website are available to you at no charge. Even so, its upkeep does incur costs. |
|
| If you feel that
the site has helped you then any contribution you make, however small,
would go towards its ongoing maintenance and development. Thanks for your help. |
| Book of the Month |
 |
| Click here to read the review. |
|
|

New! Comments
Have your say about what you just read! Leave me a comment in the box below.